Are you wondering how to install your new U-Disc from The Unlaub Company? Worry no more! Here are full instructions for installation so your U-Disc will be up and running as soon as possible.
Mounting
DO NOT USE POWER TOOLS. DO NOT DISASSEMBLE DISC PACKS.
The spacer center assembly/disc packs are factory-assembled to specific torque values. Breaking of nuts/bolts voids all warranties.
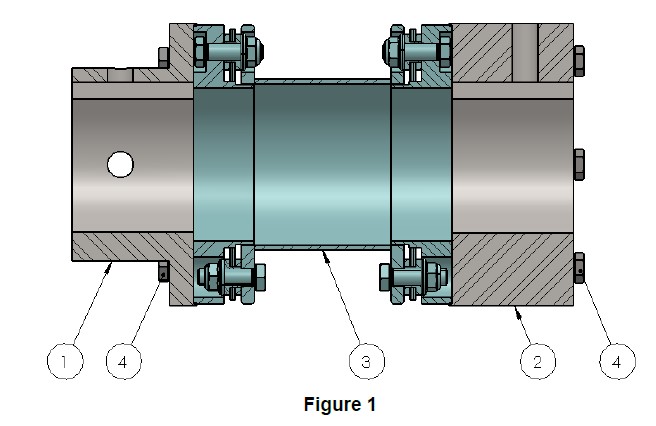
The U-Disc coupling (see Figure 1) consists of: two hubs (Items 1 & 2), one spacer center assembly (Item 3), and one accessory kit (Item 4).
- LOCK OUT/TAG OUT equipment.
- Inspect all components to confirm no damage occurred during shipment.
- Confirm your equipment shaft size is within tolerance.
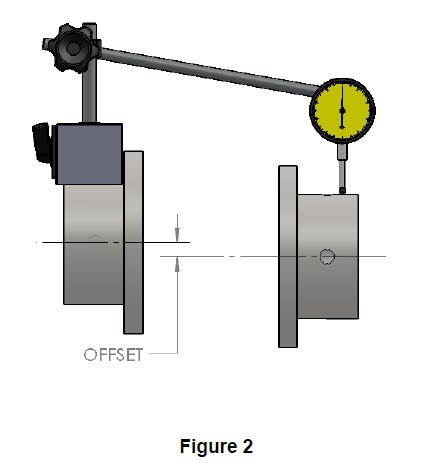
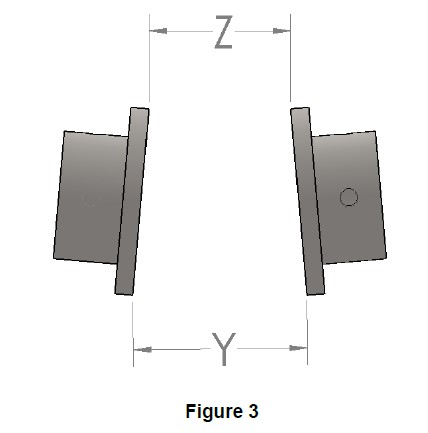
- Ensure proper shaft alignment and hub spacing (see Figure 2 & 3).
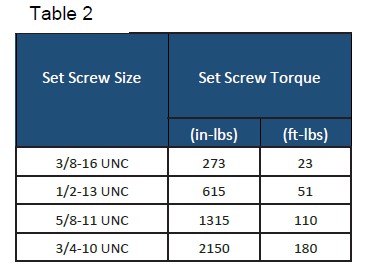
- Secure hubs to shafts with set screws. (see Table 2 for torque values).
6. Install 3 equally spaced center member compression bolts on each side of the center member. Tighten these bolts 1/2 turn at a time to compress the center member just enough to allow center member to fit between the hubs.
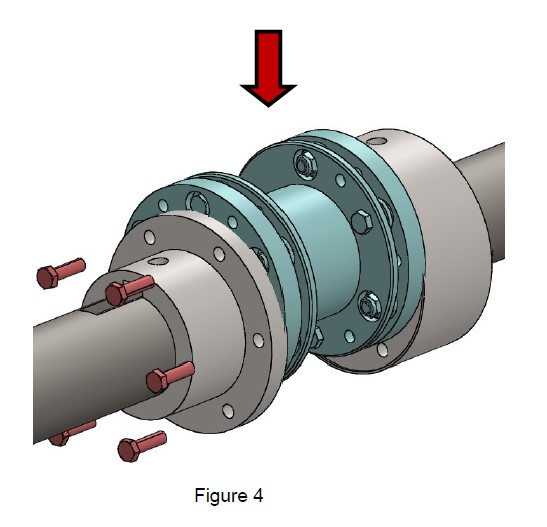
7. Place the center member between hubs. Install at least 3 mounting bolts in each hub to hold the center member in place. Do not torque bolts. See red bolts in Figure 4.
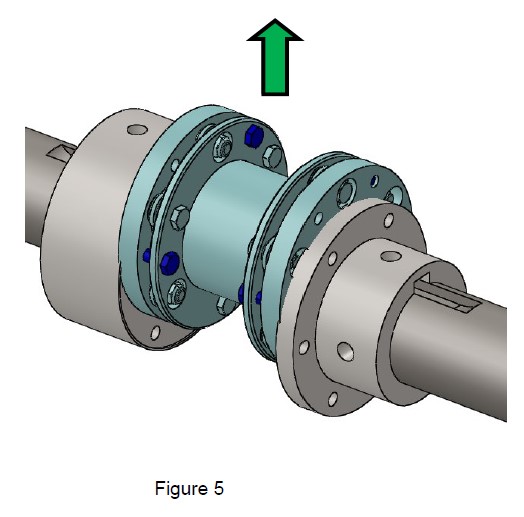
8. Remove the center member compression bolts 1/2 turn at a time. See blue bolts in Figure 5.
9. Install remaining mounting bolts and check alignment.
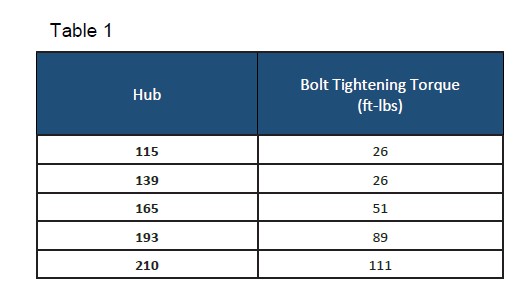
10. Progressively tighten mounting bolts to specified torque values shown in Table 1.
Center Member Removal
- Loosen hub mounting bolts (see red bolts in Figure 4).
- Compress the disc packs using the compression screws (see blue bolts in Figure 5).
- Remove the spacer center assembly.
- Dismount the hubs (see Figure 1, Items 1 and 2).